


1、首先导入jar包:

2、然后,在applicatinContext.xml中添加上传和下载的配置文件,如下:
error
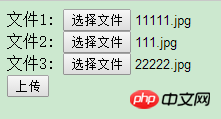
3、好了,最基础的配置就好了,接下来jsp页面:upload.jsp
1
4、Controller中对应的java代码:
@RequestMapping("/upload.do")
public String upload(@RequestParam MultipartFile[] myfiles,HttpServletRequest request) throws IOException {
for(MultipartFile file : myfiles){
//此处MultipartFile[]表明是多文件,如果是单文件MultipartFile就行了
if(file.isEmpty()){
System.out.println("文件未上传!");
}
else{
//得到上传的文件名
String fileName = file.getOriginalFilename();
//得到服务器项目发布运行所在地址
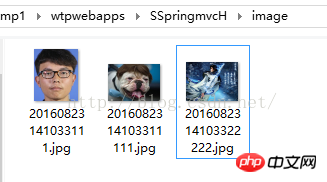
String path1 = request.getSession().getServletContext().getRealPath("image")+File.separator;
// 此处未使用UUID来生成唯一标识,用日期做为标识
String path = path1+ new SimpleDateFormat("yyyyMMddHHmmss").format(new Date())+ fileName;
//查看文件上传路径,方便查找
System.out.println(path);
//把文件上传至path的路径
File localFile = new File(path);
file.transferTo(localFile);
}
}
return "uploadSuccess";
}这样就可以把网页上选择的图片上传上去了.

I-Shop购物系统
下载
部分功能简介:商品收藏夹功能热门商品最新商品分级价格功能自选风格打印结算页面内部短信箱商品评论增加上一商品,下一商品功能增强商家提示功能友情链接用户在线统计用户来访统计用户来访信息用户积分功能广告设置用户组分类邮件系统后台实现更新用户数据系统图片设置模板管理CSS风格管理申诉内容过滤功能用户注册过滤特征字符IP库管理及来访限制及管理压缩,恢复,备份数据库功能上传文件管理商品类别管理商品添加/修改/
下载成功了!
5、文件下载download.jsp:此处为了测试,我直接把用户名当作参数传过去:
下载
6、Controller:
@RequestMapping("/download")
    public String download(String fileName, HttpServletRequest request,
            HttpServletResponse response) {
        response.setCharacterEncoding("utf-8");
        response.setContentType("multipart/form-data");
        response.setHeader("Content-Disposition", "attachment;fileName="
                + fileName);
        try {
            String path = request.getSession().getServletContext().getRealPath
                    ("image")+File.separator;
            InputStream inputStream = new FileInputStream(new File(path
                    + fileName));

            OutputStream os = response.getOutputStream();
            byte[] b = new byte[2048];
            int length;
            while ((length = inputStream.read(b)) > 0) {
                os.write(b, 0, length);
            }

             // 这里主要关闭。
             os.close();

            inputStream.close();
        } catch (FileNotFoundException e) {
            e.printStackTrace();
        } catch (IOException e) {
            e.printStackTrace();
        }
            //  返回值要注意,要不然就出现下面这句错误!
            //java+getOutputStream() has already been called for this response
        return null;
} 


