


准备工作:
1、Intellij IDEA (ULTIMATE版):官网下载地址
2、JDK
PHP+MySQL商业网站架设实务
下载
第1章Linux入门 1-1操作系统的特性 1-2安装设置 1-2-1硬盘分区 1-2-2设置LILO 1-2-3网络地址和时区设置 l-2-4设置系统管理员及一般用户的帐号密码 1-2-5系统安全认证 l-2-6选取安装套件 1-2-7设置显示卡及测试Xwindows l-2-8开始安装套件 l-3常用命令 l-4网络基本设
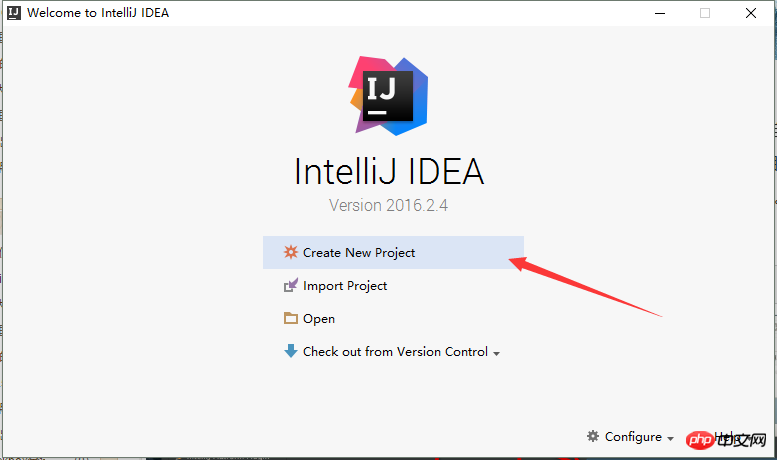
一、创建新项目
二、左侧面板选择Spring Initializr

输入项目名称,项目组名称和项目ID,点击进入下一步

下面的页面是用于添加依赖的,可以根据需求,添加依赖。或者在pom.xml文件进行添加也可以。主要包括:Core(核心依赖)、SQL、NOSQL
当前测试只需勾选 Web。

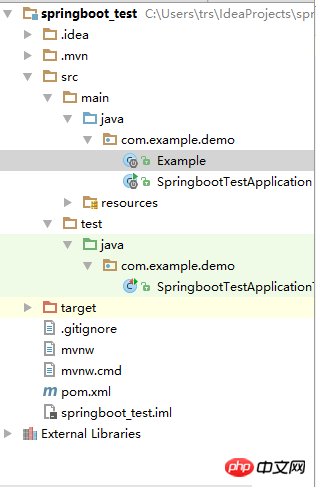
点击Next,项目创建结束。项目架构如下所示:(注:Example.java是我添加的)
二、在相应目录下创建 Example.java。代码如下:
package com.example.demo;

import org.slf4j.Logger;
import org.slf4j.LoggerFactory;
import org.springframework.boot.autoconfigure.EnableAutoConfiguration;
import org.springframework.web.bind.annotation.PathVariable;
import org.springframework.web.bind.annotation.RequestMapping;
import org.springframework.web.bind.annotation.RestController;

@RestController
@EnableAutoConfiguration
public class Example {
    @RequestMapping("/")
    String home() {
        return "Hello World!";
    }

    @RequestMapping("/hello/{myName}")
    String index(@PathVariable String myName) {
        return "Hello "+myName+"!!!";
    }
}
三、运行项目,选中 SpringbootTestApplication.java,右击--Run 'SpringbootTestApplication' ,或者点击如图所示按钮:

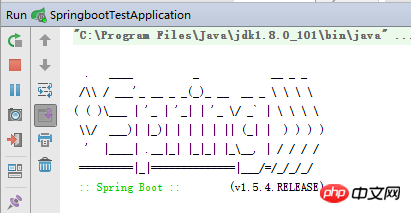
四、程序成功启动,控制台如下所示(部分):

五、最后我们来测试一下:输入 http://localhost:8080/ 和 http://localhost:8080/hello/王大陆


测试成功!!!
最后,另外附上pom.xml代码,仅供参考。
   4.0.0

   com.example
   springboot_test
   0.0.1-SNAPSHOT
   jar

   springboot_test
   Demo project for Spring Boot


      org.springframework.boot
      spring-boot-starter-parent
      1.5.4.RELEASE


      UTF-8
      UTF-8
      1.8


         org.springframework.boot
         spring-boot-starter-web


         org.springframework.boot
         spring-boot-starter-test
         test


            org.springframework.boot
            spring-boot-maven-plugin
这是第一次接触 SpringBoot架构,恩,先记下来,免得以后忘记了


